Conversation Processing
Simply can record, transcribe, and analyze your recruitment conversations, then synchronize the extracted data directly into Salesforce. This guide walks through the full workflow from recording to completion.
Recording a Conversation
To process a conversation, you first need a recording. If you've set up the Simply AI meeting bot during your configuration, it will automatically join your video calls and record them silently.
After the meeting ends, Simply AI will automatically upload the recording to your conversations dashboard.
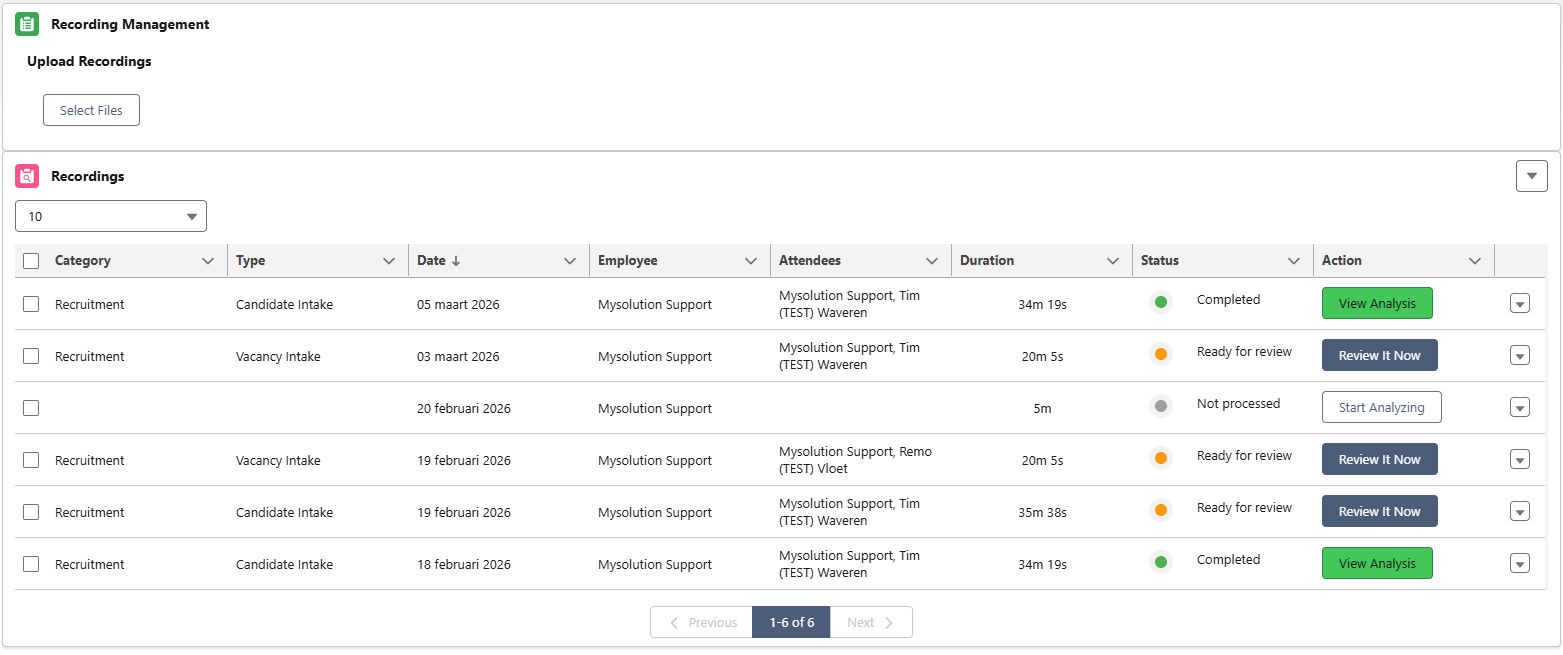
The Conversations Dashboard
Open your conversations dashboard by searching for Conversations in the Salesforce navigation menu. Here you'll see all of your recordings and their current status:
- 🟢 Completed: fully processed and synchronized
- 🟠 Ready for review: AI analysis is done, waiting for your review
- 🔵 Processing: analysis is currently running
- ⚪ Not processed: recording uploaded but not yet analyzed
Starting the Analysis
Find your most recent conversation (it will show as Not processed) and click the Start Analyzing button.
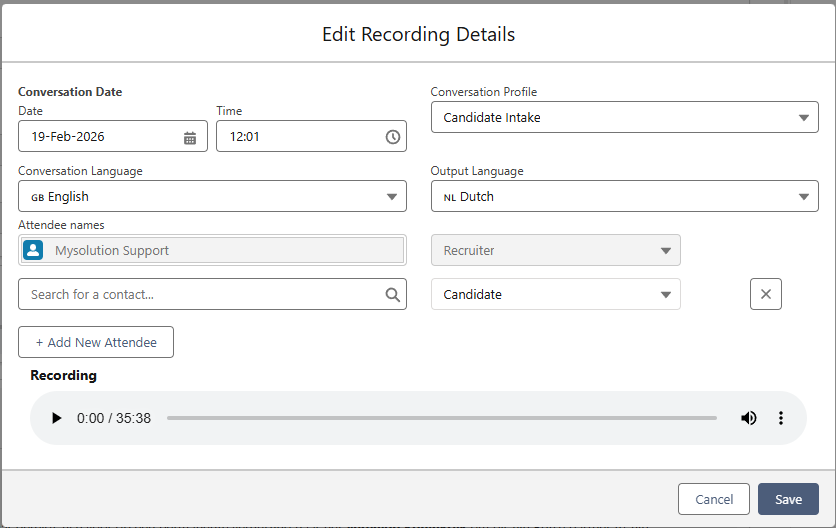
A popup will appear where you can configure the analysis settings:
- Conversation Profile: select the type of conversation (e.g. "Candidate Intake")
- Conversation Language: the language spoken in the recording
- Output Language: the language you want the summary and data points in
- Attendee Names: search for and select the contact(s) involved

You cannot process a conversation for a contact that hasn't been created yet. Make sure the contact exists in Salesforce before starting the analysis, so you can search for and select them in the attendee field.
Click Save to begin the analysis. The status will change to Processing.

Once the analysis is complete, the status will update to Ready for review.

Click the Review It Now button to open the analysis page.
If the status doesn't seem to update, try refreshing the page. This can occasionally happen but is usually not an issue.
Reviewing the Analysis
The analysis page shows everything Simply extracted from the conversation.
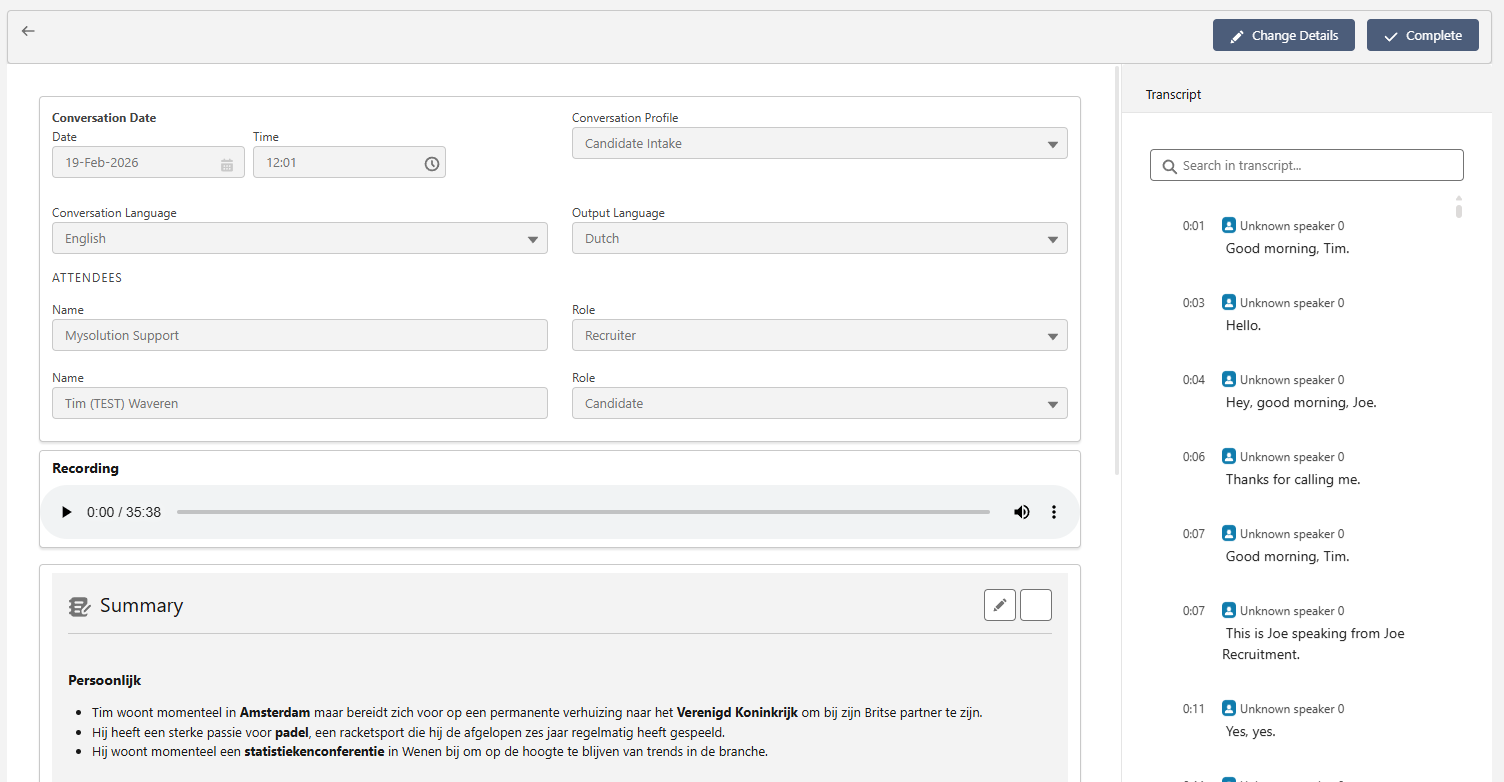
Conversation Details
On the left side, you'll see the conversation metadata (date, profile, language, attendees) along with an audio player for the original recording. The full transcript is displayed on the right side with timestamps, so you can quickly find and verify specific parts of the conversation.
Changing Details
If you made a mistake in the conversation settings, click the Change Details button at the top. This opens the Edit Recording Details popup where you can update the contact, conversation profile, language, or any other setting. After saving, Simply will reprocess the conversation with the updated configuration.

Editing the Summary
Below the conversation details, you'll find the AI-generated summary. If you want to make any manual edits, click the pencil icon in the top-right corner of the summary section to open the rich text editor.

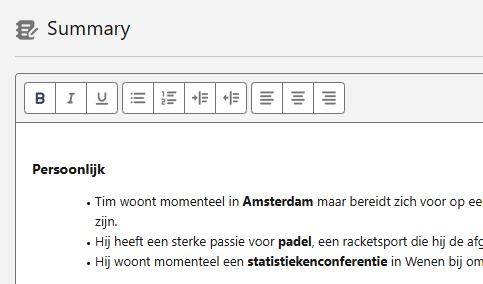
Make your changes and click Save when you're done.

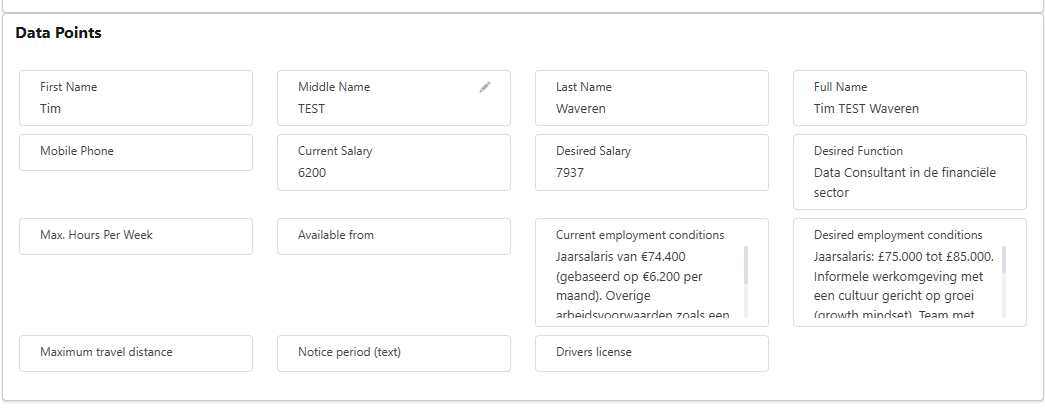
Data Points
Below the summary, you'll see the individual data points Simply extracted from the conversation (e.g. first name, salary, desired function, employment conditions). You can edit any of these by clicking the pencil icon on the field, making your change, and clicking away to confirm.


Completing the Conversation
Once you've reviewed and validated that all the information is correct, go back to the top and click the Complete button.
![]()
This triggers all of the synchronization automations:
- An activity log entry is created on the contact's record
- A Simply Recordings entry is added to the contact's related list
- All extracted data points are synchronized into your Salesforce fields according to your mapping configuration
Results After Completion
After completing the conversation, you can verify the results on the contact's profile page.
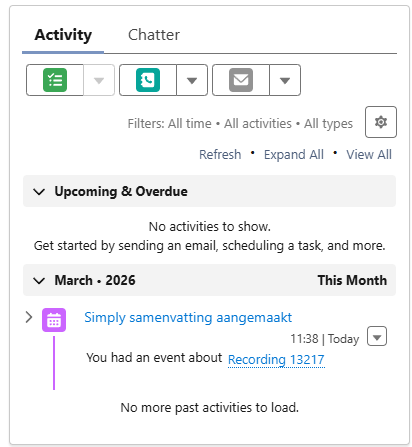
Activity Log
An activity entry is automatically created, logging the conversation summary event with a link to the recording.
Simply Recordings Widget
The conversation appears in the Simply Recordings related list on the contact's page.

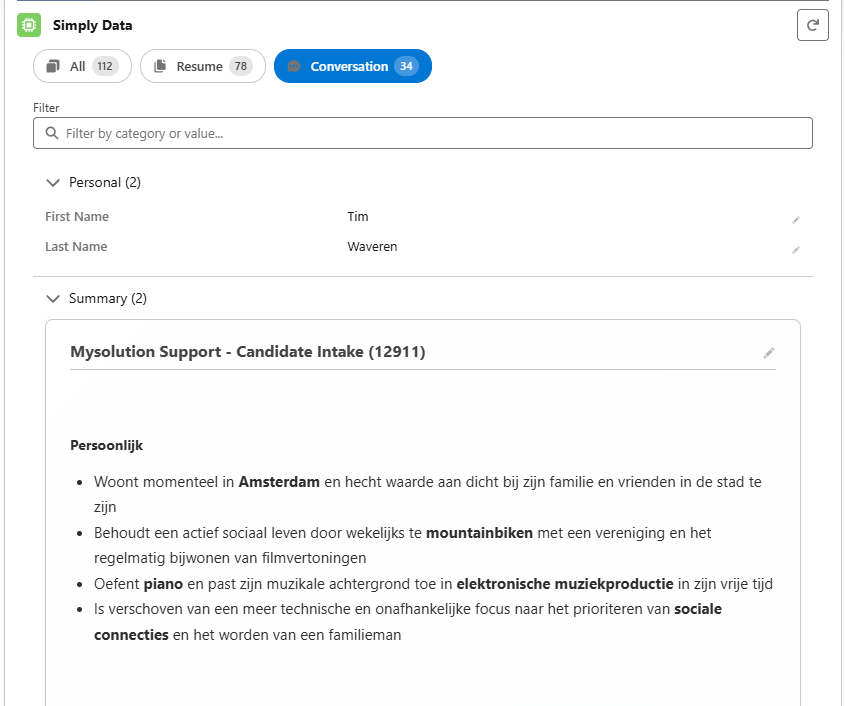
Simply Data Viewer
All extracted conversation data is now visible in the Simply Data Viewer widget, alongside any existing CV data. You can filter by source using the tabs at the top (All, Resume, Conversation).