CV Parser
The CV Parser allows you to extract structured candidate data from CVs and automatically populate your Salesforce records. There are two main ways to use it, depending on whether you're creating a new contact or updating an existing one.
When a CV is uploaded through the CV Parser, Simply will also store a copy of the original CV in the Notes & Attachments section on the contact's record, so you always have the source file available.
Creating a New Contact
If you're adding a brand new candidate to your database, use the CV Parser widget on your homepage or general page.
-
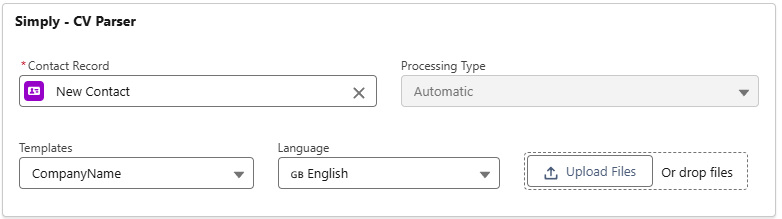
Click the + icon to create a new contact. This will automatically set the Contact Record field to "New Contact".
-
The Processing Type will default to Automatic. This means Simply will skip the manual review step and directly write all parsed data into the new contact record. Since there's no existing data to conflict with, everything extracted from the CV goes straight in.
-
Your Template should be pre-selected based on your configuration. You can change the Language to control what language the output will be generated in.
-
Upload the CV by clicking Upload Files or dragging and dropping the file.
-
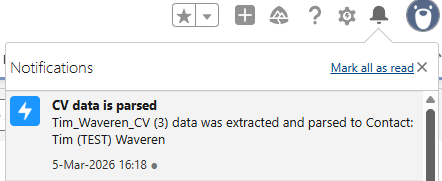
Once processing is complete, you'll receive a Salesforce notification confirming that the data was extracted and parsed to the contact.
That's all there is to it. Your new contact is created and populated with the candidate's data.
Updating an Existing Contact
When you receive an updated CV for a candidate who already exists in your Salesforce, you'll want to review the changes before overwriting anything. For this workflow, use the CV Parser widget directly on the candidate's profile page. This way you don't need to manually select the contact record.
-
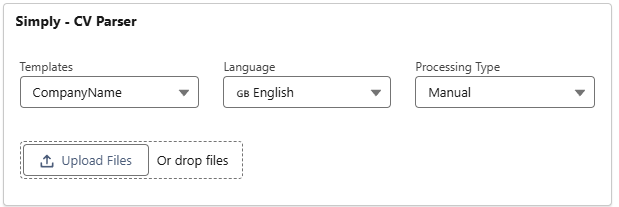
Your Template should already be set. Choose the Language for the output.
-
Set the Processing Type to Manual. This ensures you'll get to review all parsed data before it's written to Salesforce.

-
Upload the CV. After processing, you'll be taken to the CV Parser tab, where you can track the status.
-
While the CV is being processed, the status will show as Pending.

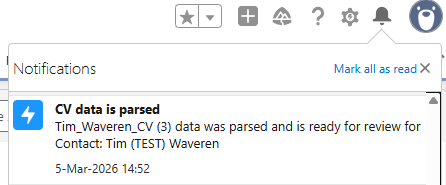
- Once processing is complete, you'll receive a notification that the data was parsed and is ready for review. The status will update accordingly.

- Click the Ready for Review button to open the comparison tool.
The Comparison Tool
The comparison tool shows you a side-by-side view of the data Simply extracted from the new CV (left) and the data currently in your Salesforce (right). In the middle, color-coded icons tell you exactly what's happening with each field:
| Icon | Meaning |
|---|---|
| ✕ (gray) | Data was found in the CV but not mapped in your configuration. It will be dropped. |
| → (gray) | Data was found in the CV and the Salesforce field is currently empty. It will be filled automatically. |
| → (green) | Data in the CV matches what's already in Salesforce. No changes needed. |
| ⚠️ (orange) | Conflicting data: the CV contains different information than what's in Salesforce. |
Resolving Conflicts
When you see the ⚠️ warning icon, you can decide what to do with each conflict:
- Check the box to overwrite the Salesforce value with the CV data. The icon will change to a green arrow (→), confirming the overwrite.
- Uncheck the box to keep the existing Salesforce value. The icon will change to a red ✕, meaning the CV data will be dropped.
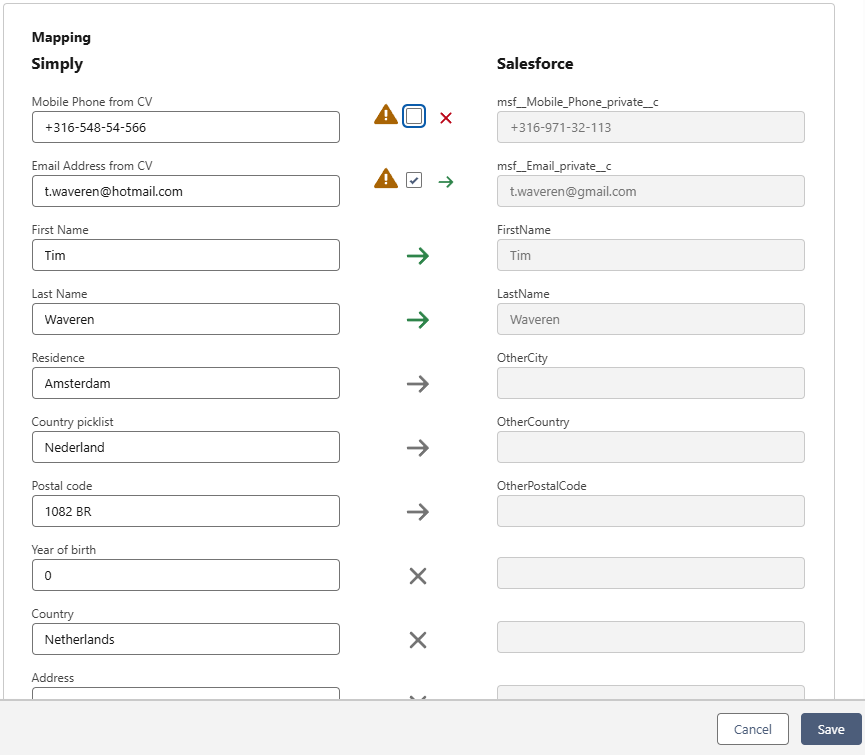
Once you've reviewed all conflicts, click Save. All data will be synchronized with your Salesforce according to your mapping configuration.
After Parsing
After saving, the candidate's profile will be updated:
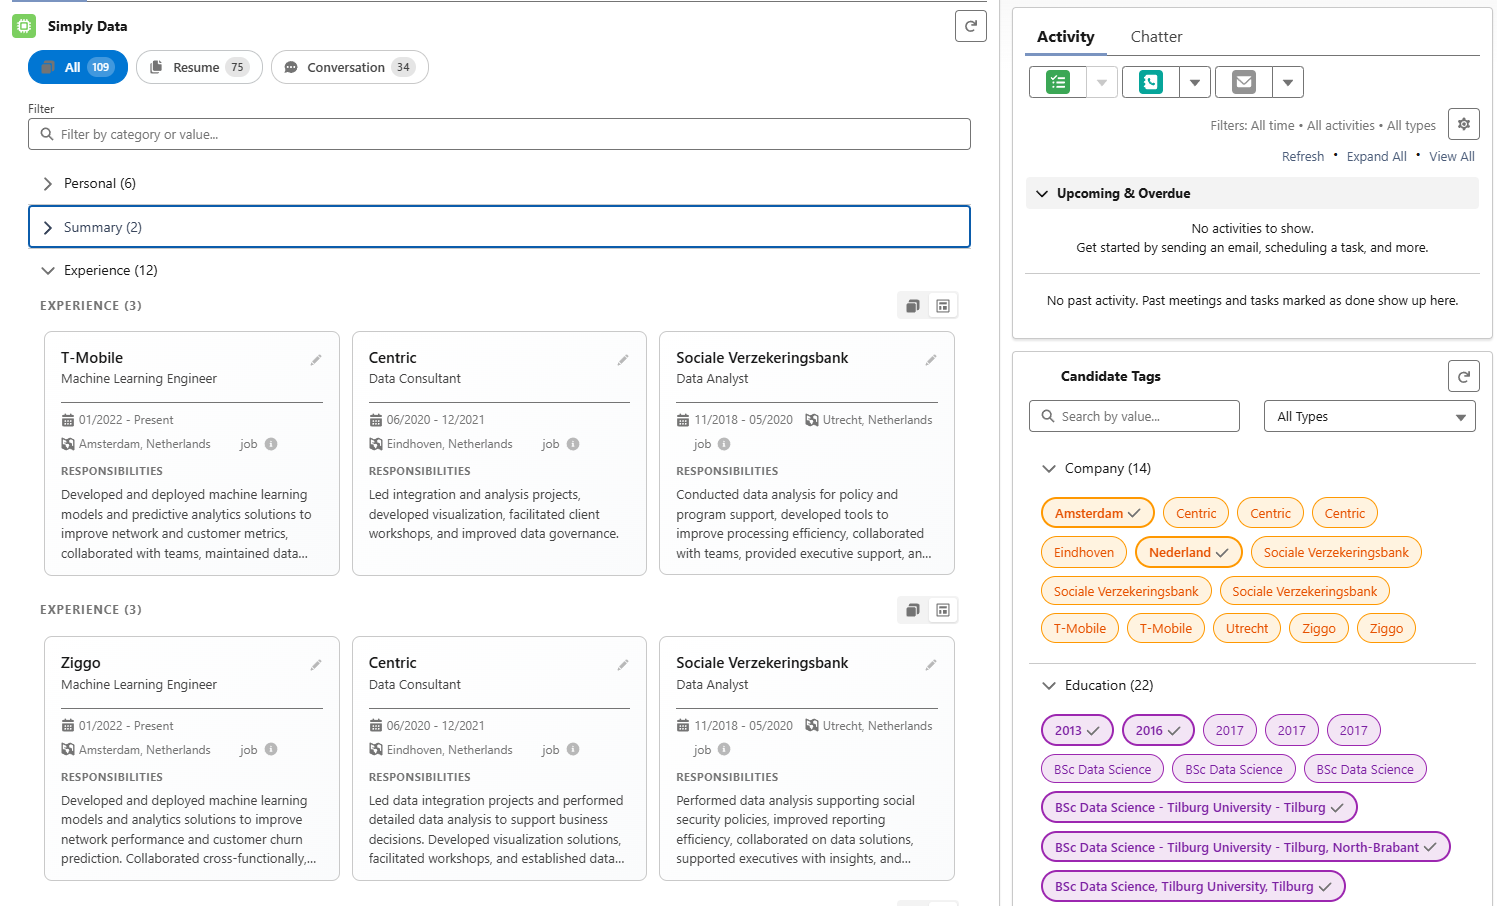
- The Simply Data Viewer widget will display all extracted information, organized by category (Personal, Summary, Experience, etc.)
- Candidate Tags will be automatically generated based on the parsed data
- Any fields you mapped at a singular level will be filled in or updated according to your review choices
The uploaded CV will also be stored under Notes & Attachments on the contact record.

You've now successfully parsed your first CV in Salesforce! 🎉